



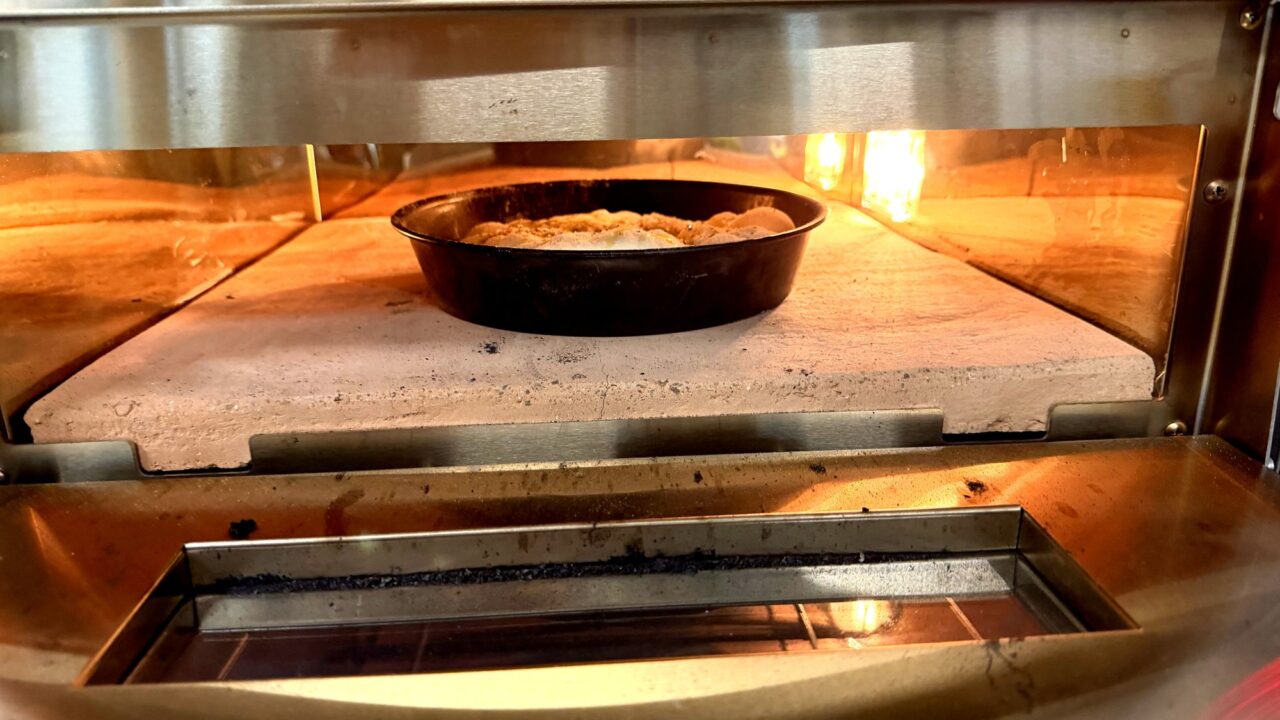
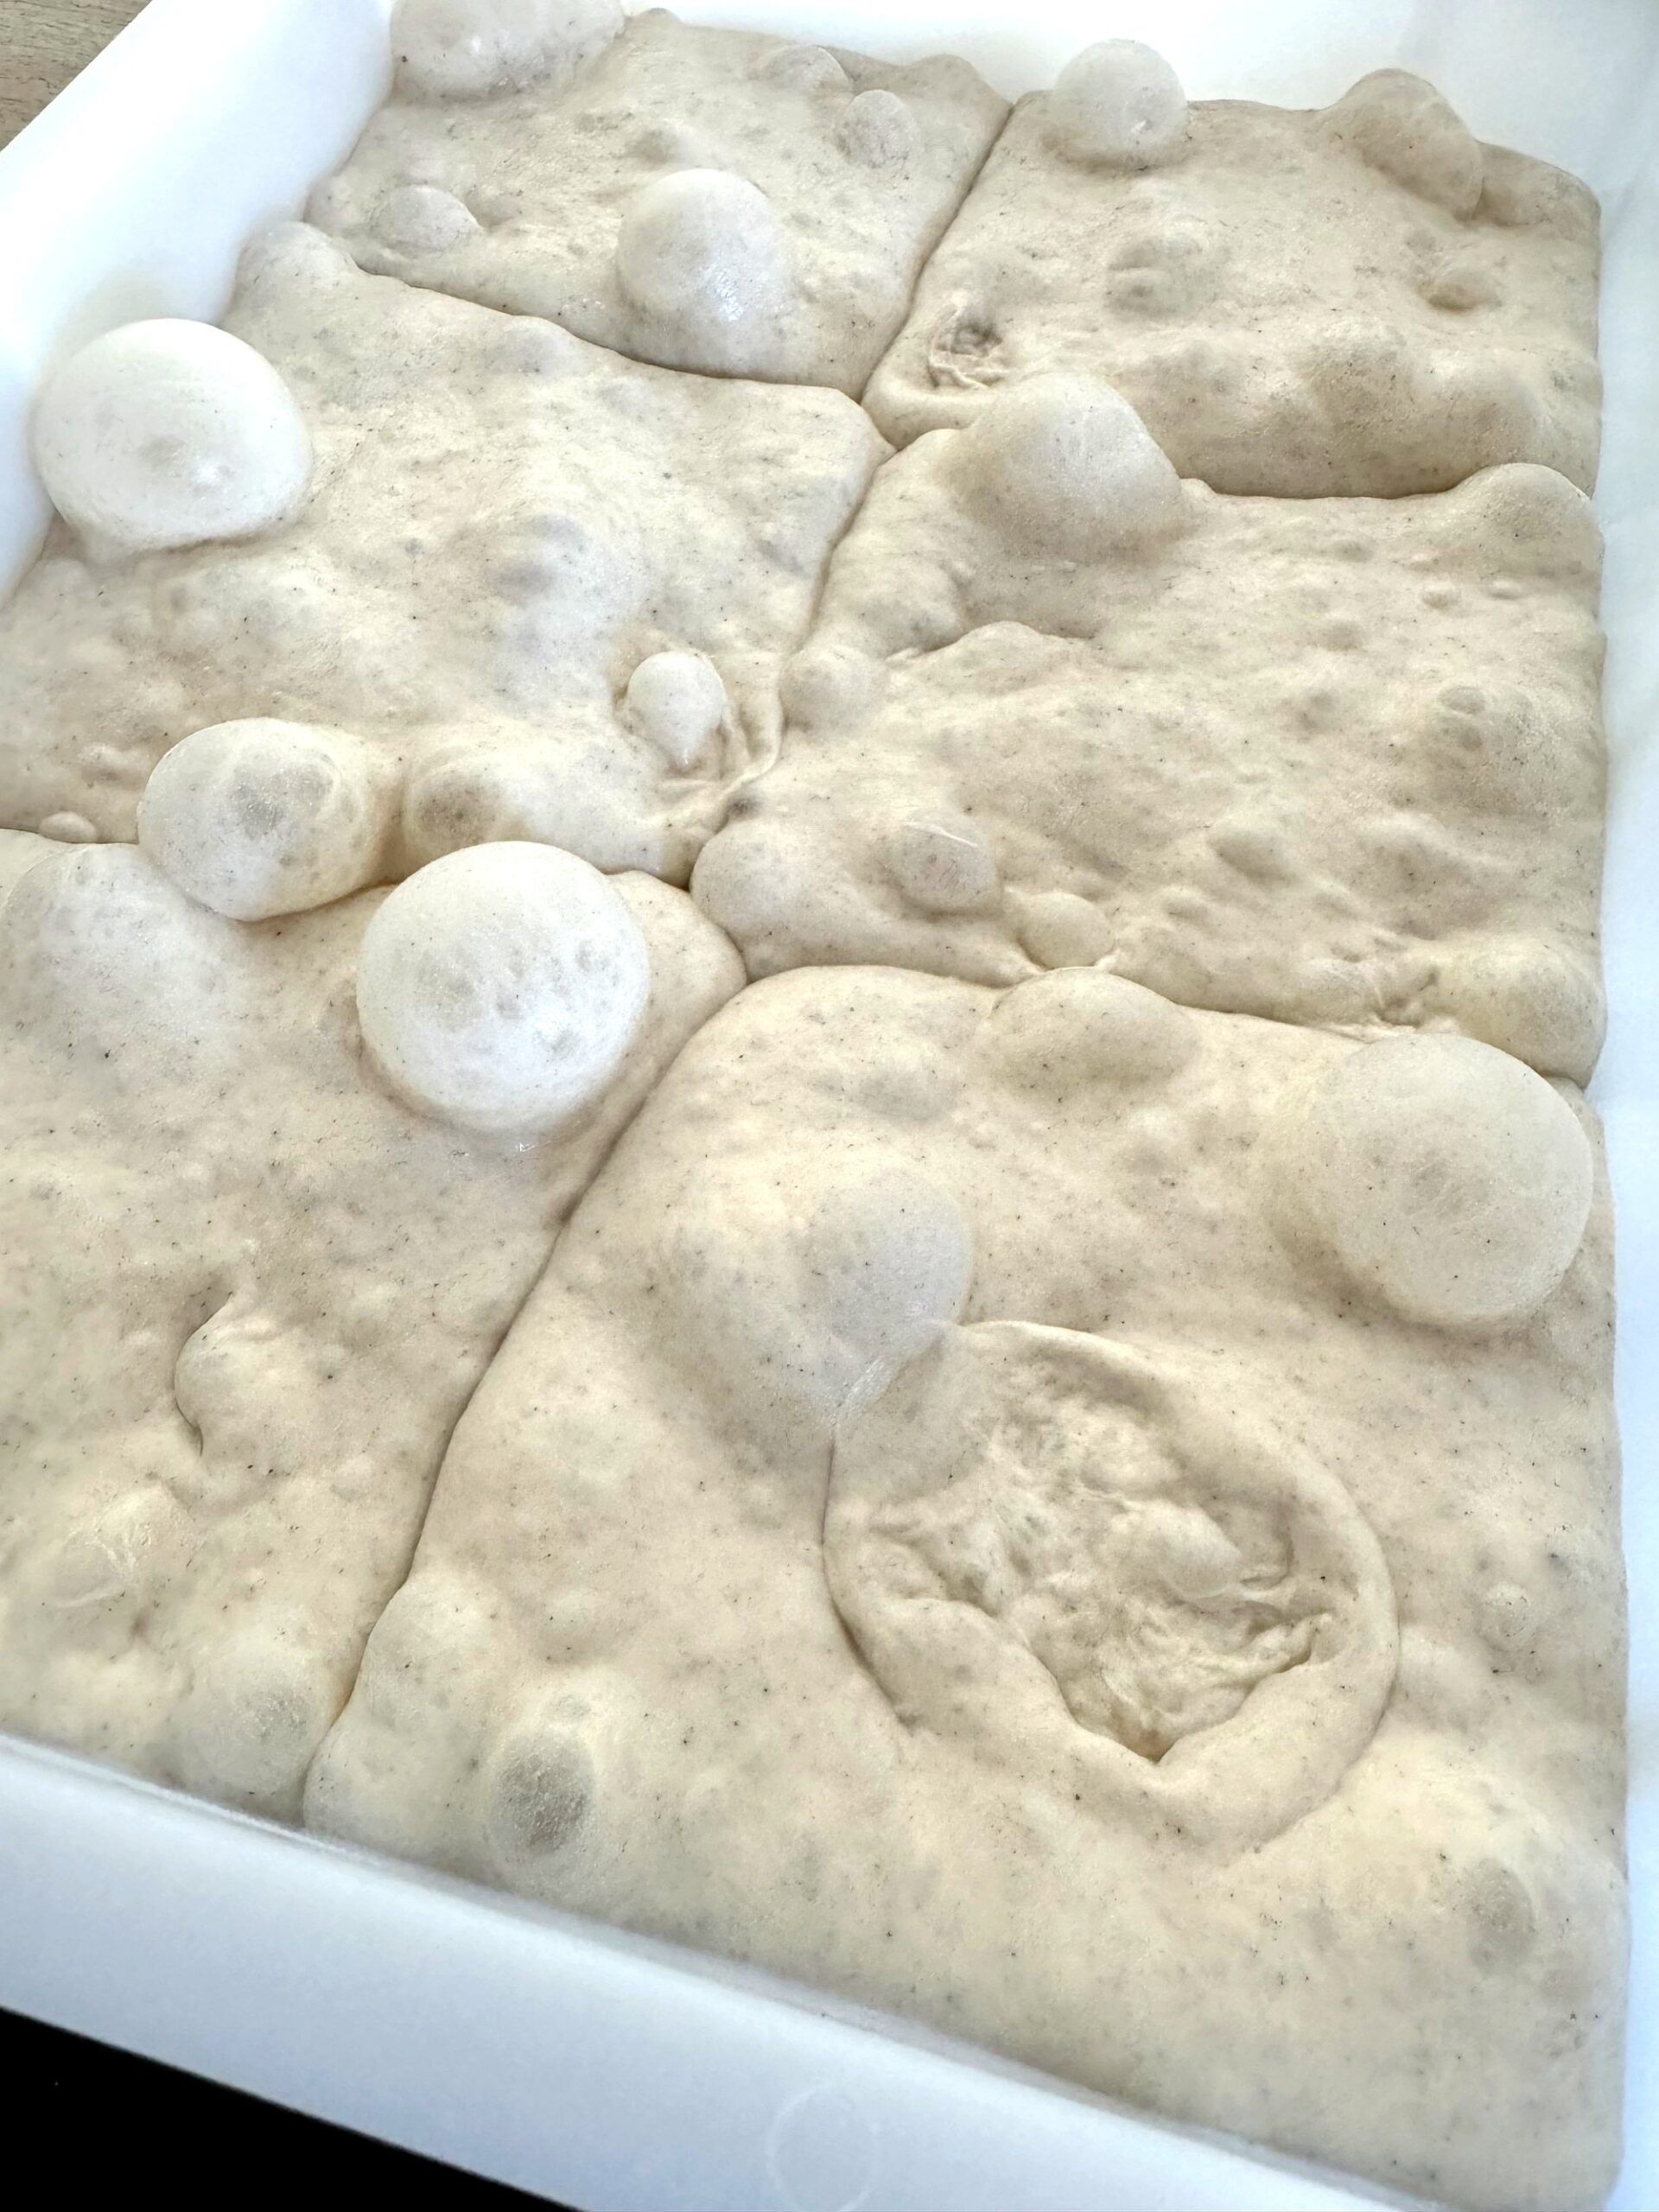
Thursday poolish, Friday dough, Saturday course day with five hours of room temperature in between, then over the weekend in the refrigerator. On Monday, I opened the box: the bubbles had long since merged, really extreme over-proofing. The dough was done for a pizza, far too weak to stretch. So I got the round baking pan.
🍞 Bread from pizza dough: why the leftover over-proofed dough is suitable for it
This is how the dough was made: On Thursday, I prepared the poolish, a liquid pre-dough made of equal parts flour and water plus very little yeast. It already has a slight acidity, completely independent of anything that comes after. On Friday, I made the dough from it and put it in the refrigerator for proofing. Saturday was the course day in the Masterclass, where the dough stood at room temperature for about five hours, and the remaining portion then went back into the refrigerator. On Monday, after the weekend, I took it out, looked at it, and smelled it; everything was fine. It then stood at room temperature for another good five hours before I tested it, and the result was simply full of flavor. It had 72% hydration, meaning 720 g of water per 1 kg of flour.
What such a dough lacks after this journey is structure. What it has instead is flavor. You can never achieve this sour depth with a dough you prepare in the afternoon.
And that’s exactly the trick: you have to stretch a pizza, get it onto the peel, and shoot it into the oven. For that, the dough needs its own stability. In a pan with a high rim, it no longer needs that. The pan holds it together, and it can do what it can still do: rise, brown, form an open crumb. Crumb is the inside of the bread, everything except the crust.
After the grissini and the mini ciabatta, this is my third attempt with leftover pizza dough. The difference: with the first two, the dough was still in good shape. Here, it was no longer.
Recognizing over-proofing: which dough is still usable and which is not
Over-proofing means your dough has gone past its prime. But not all over-proofing is the same, and only one type can be saved by a baking pan.
What matters is the gluten network. This is the protein structure in the dough that holds the fermentation gases. If it’s just overstretched, something can still be done. If it’s broken down, it’s over.
| Form of over-proofing | How to recognize it | Still usable? |
|---|---|---|
| Volume over-proofing (from the yeast) | Dough has risen a lot and collapsed again. Large, thin-walled bubbles are on top. The gluten network is overstretched. | Yes. Exactly the case for the pan. |
| Enzymatic over-proofing | Dough runs flat, is extremely sticky, the surface is almost wet and shiny. Proteases, i.e., protein-splitting enzymes, have permanently broken down the gluten protein. | No. It will also be dense and doughy in the pan. |
| Sugar depletion | Dough looks normal, but even at full heat in the oven, it doesn’t brown. The yeast has used up the available sugar. | No, at least not for browning. More heat won’t help. |
The finger test is quick: press an indentation into the dough. If it springs back, there’s still life in it. If it stays put lifelessly, you’re in over-proofing territory. However, the test doesn’t tell you which of the three it is.
The smell is a more important indicator: a long-fermented dough can smell slightly sour or fruity, which is normal. A distinct alcoholic note, on the other hand, is the end of the line. The same goes for dough that has completely collapsed or become truly liquid.
My workshop leftover smelled very sour, but not bad; some of that certainly came from the poolish. No alcohol, not liquefied, but the bubbles had long since merged. After Thursday poolish, Friday dough, Saturday five hours at room temperature during the course, and then more room temperature on Monday, it was extreme volume over-proofing, but still volume over-proofing.
In the photos, you also see small dark spots in the dough. These don’t come from over-proofing but from the flour. What exactly that means and why it’s not a mistake with us, I’ve written about in the article on brown spots in pizza dough. With long cold fermentation, these spots become even more visible.
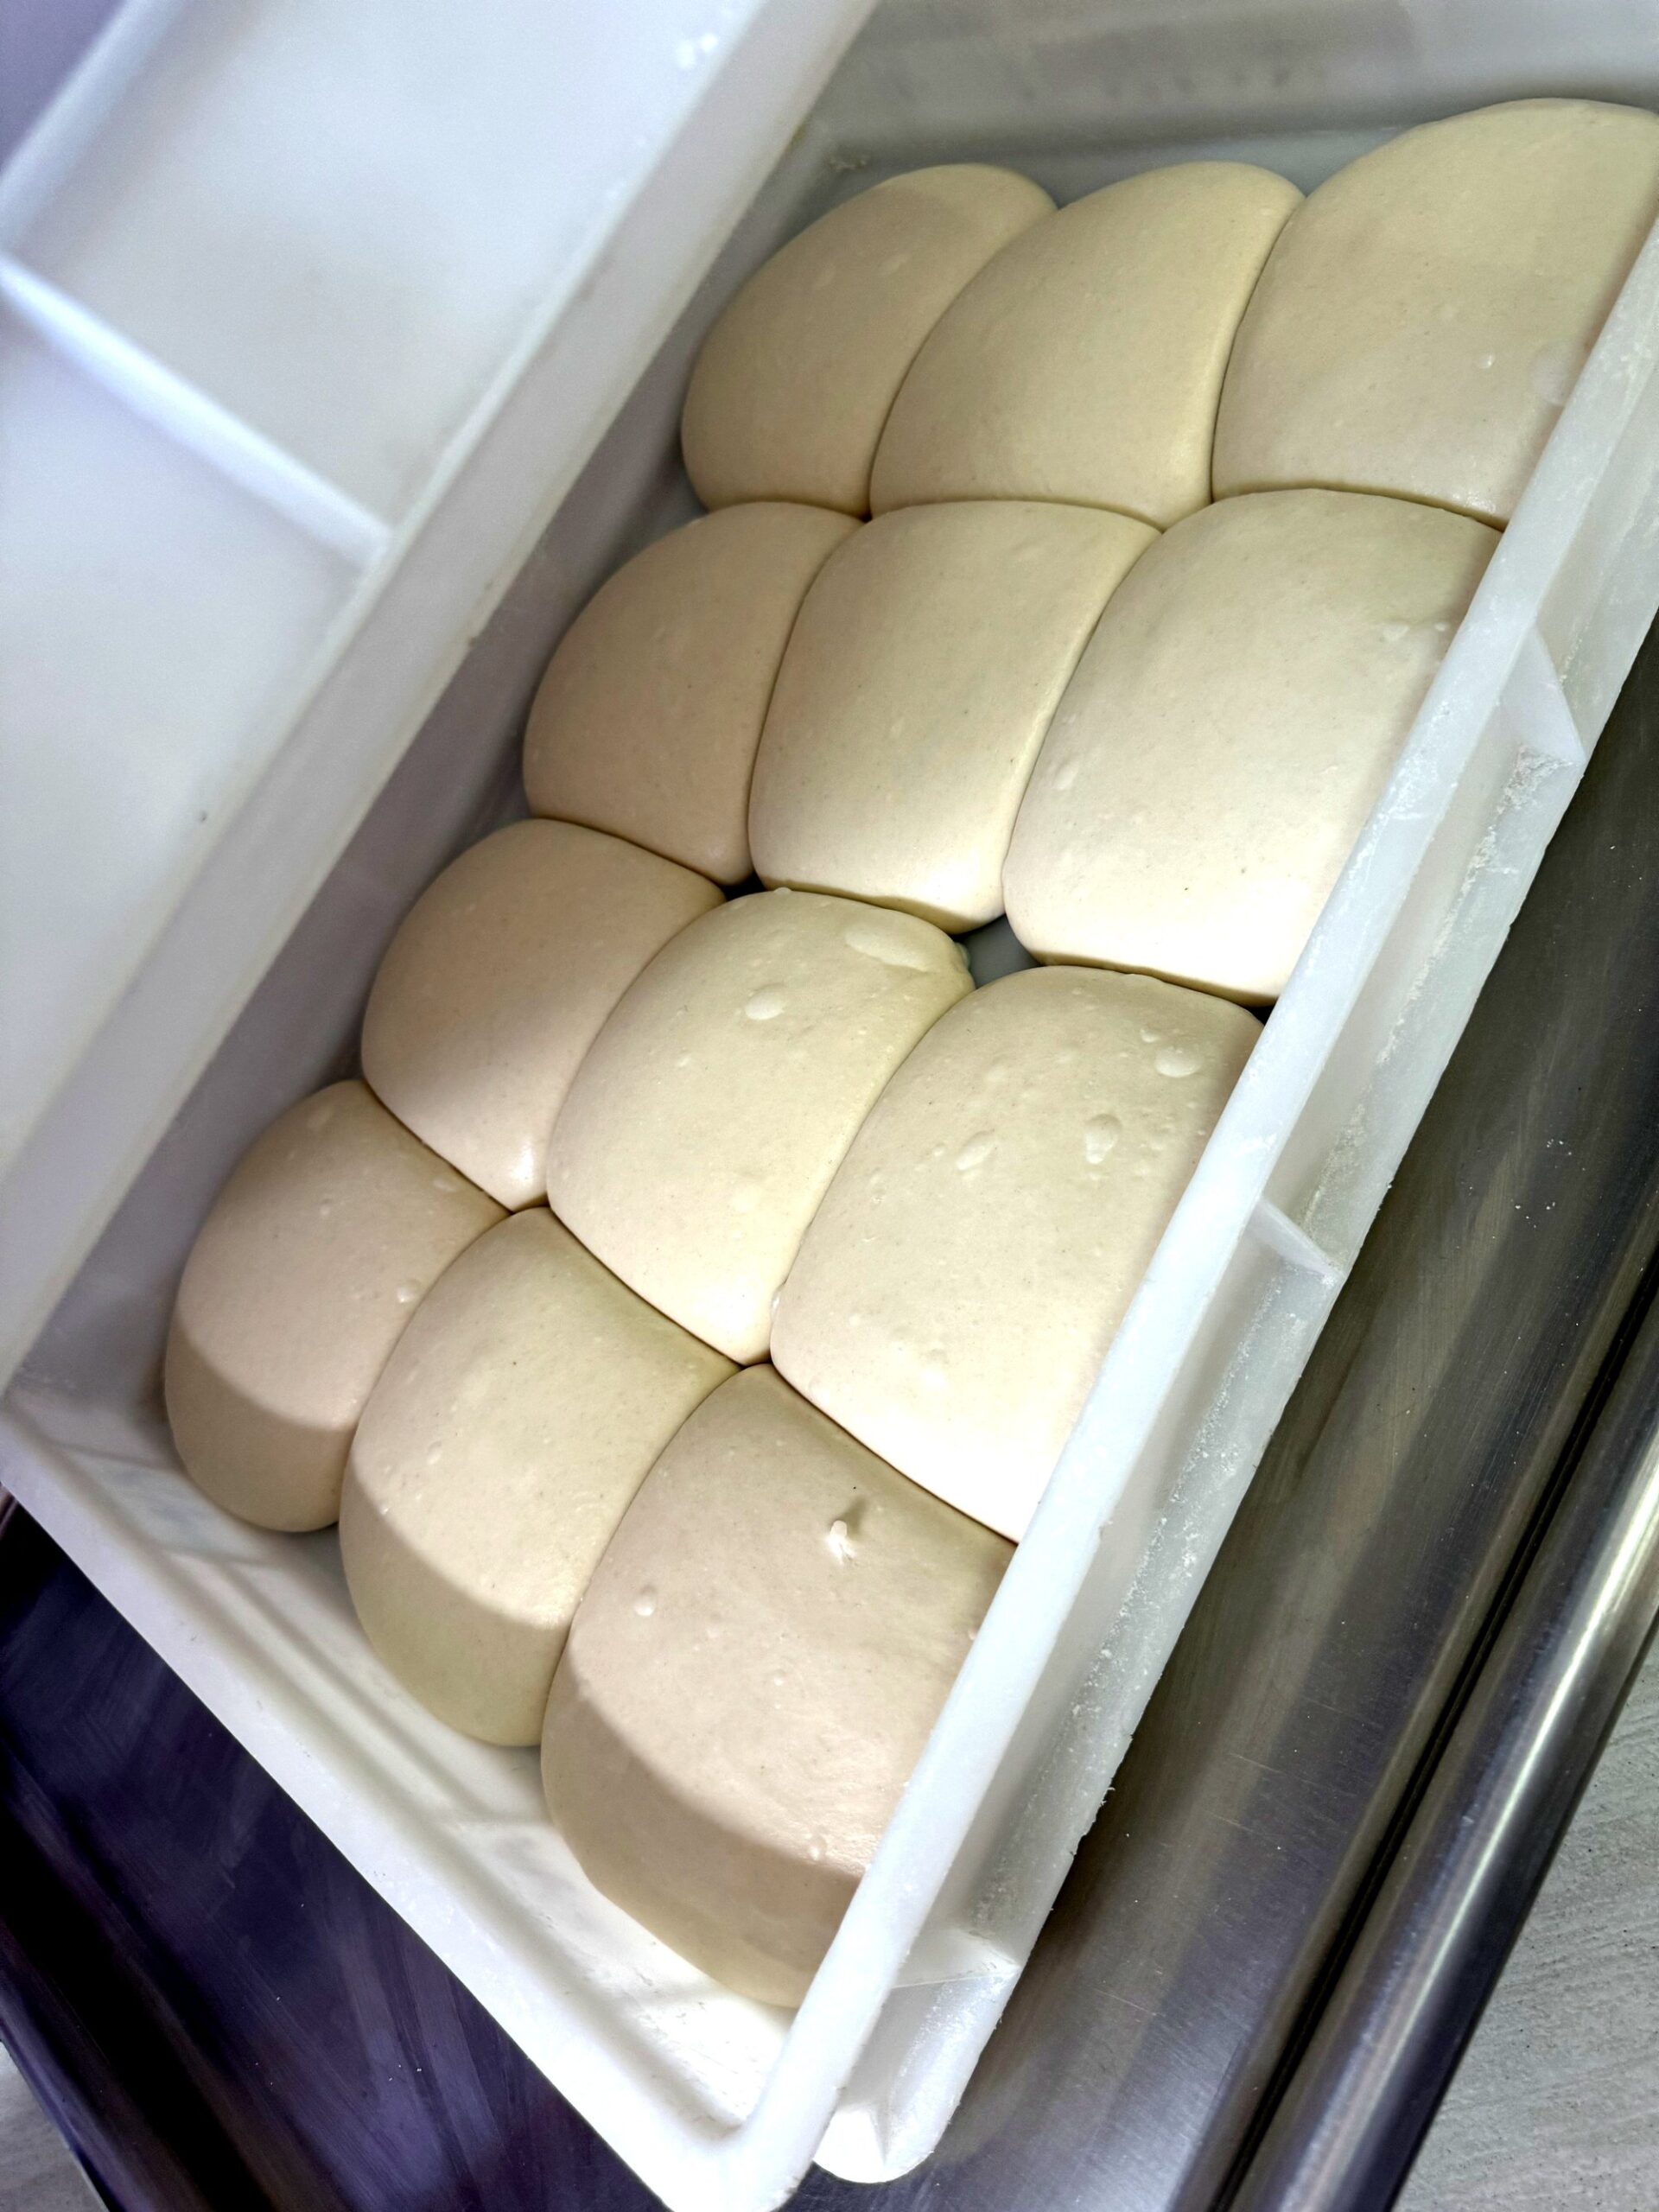
- Smell: Slightly sour or fruity is okay. Clearly alcoholic is over.
- Look: Large bubbles and still structure indicate volume over-proofing. A collapsed, shiny surface is ruined.
- Press: If the indentation stays, it’s over-proofed. Combined with smell and appearance, you’ll know which type.
In the end, your senses count more than any table. If the dough smells strongly repulsive, truly disgusting, it’s ruined. You don’t need a checklist anymore; your gut feeling usually tells you quite reliably.
To prevent this from happening constantly: Pure cold fermentation from about four to five days onwards typically makes such dough flatter and stickier. However, my dough also had two rounds at room temperature, five hours during the course, and another five hours on Monday before testing, and everything happens much faster at room temperature than in the refrigerator. All of this together turned normal cold fermentation into extreme over-proofing. How far you can go with pure cold fermentation and what the flour has to do with it, I’ve written about extensively in the article on cold fermentation and proofing time.
🥄 How to turn dough into bread
You don’t start anything new. You take what you have and let it rest.
You will need:
- 🫓 A leftover pizza dough with volume over-proofing. A normal dough ball is sufficient; mine are between 270 and 290 g.
- ⭕ A round baking pan with a high rim; mine is Ø 20 cm with 4 cm height.
- 🫒 Olive oil, for the bottom and top.
- 🧂 Flake salt.
- 🌿 Herbs de Provence.
- 🔪 A dough scraper or dough card.
First, grease the bottom of the pan with olive oil. Then, carefully lift the dough out of the box with the scraper and place it in the pan. Do not pull, do not shape into a ball, do not form into a loaf.
Do not knead, do not fold, do not degas. Degassing means pressing out the air. But that’s the only thing the dough has left to offer after four days. Every handling costs you structure that you won’t get back.
At the top, just prick the largest bubbles. Otherwise, they would bake into hollows, and you’d end up with more hole than bread. The small ones remain; they create the open crumb.
Then, more olive oil on top, flake salt, and Herbs de Provence. Preparation is complete.
🔥 Baking: the safe and the bold option
The way I recommend: 250 °C in the oven or pizza oven. The Cerutti blue steel pan Ø 20 cm that I used is approved by the manufacturer up to 250 °C. It’s best to stick to that.
The bread will bake longer than in my attempt. There’s no reliable time given, as it depends too much on the oven. Go by color: when it’s golden brown all around, it’s done.
Second test if you’re unsure: knock on the underside with your knuckle. If it sounds hollow, the bread is done. If it sounds dull, it needs a few more minutes.
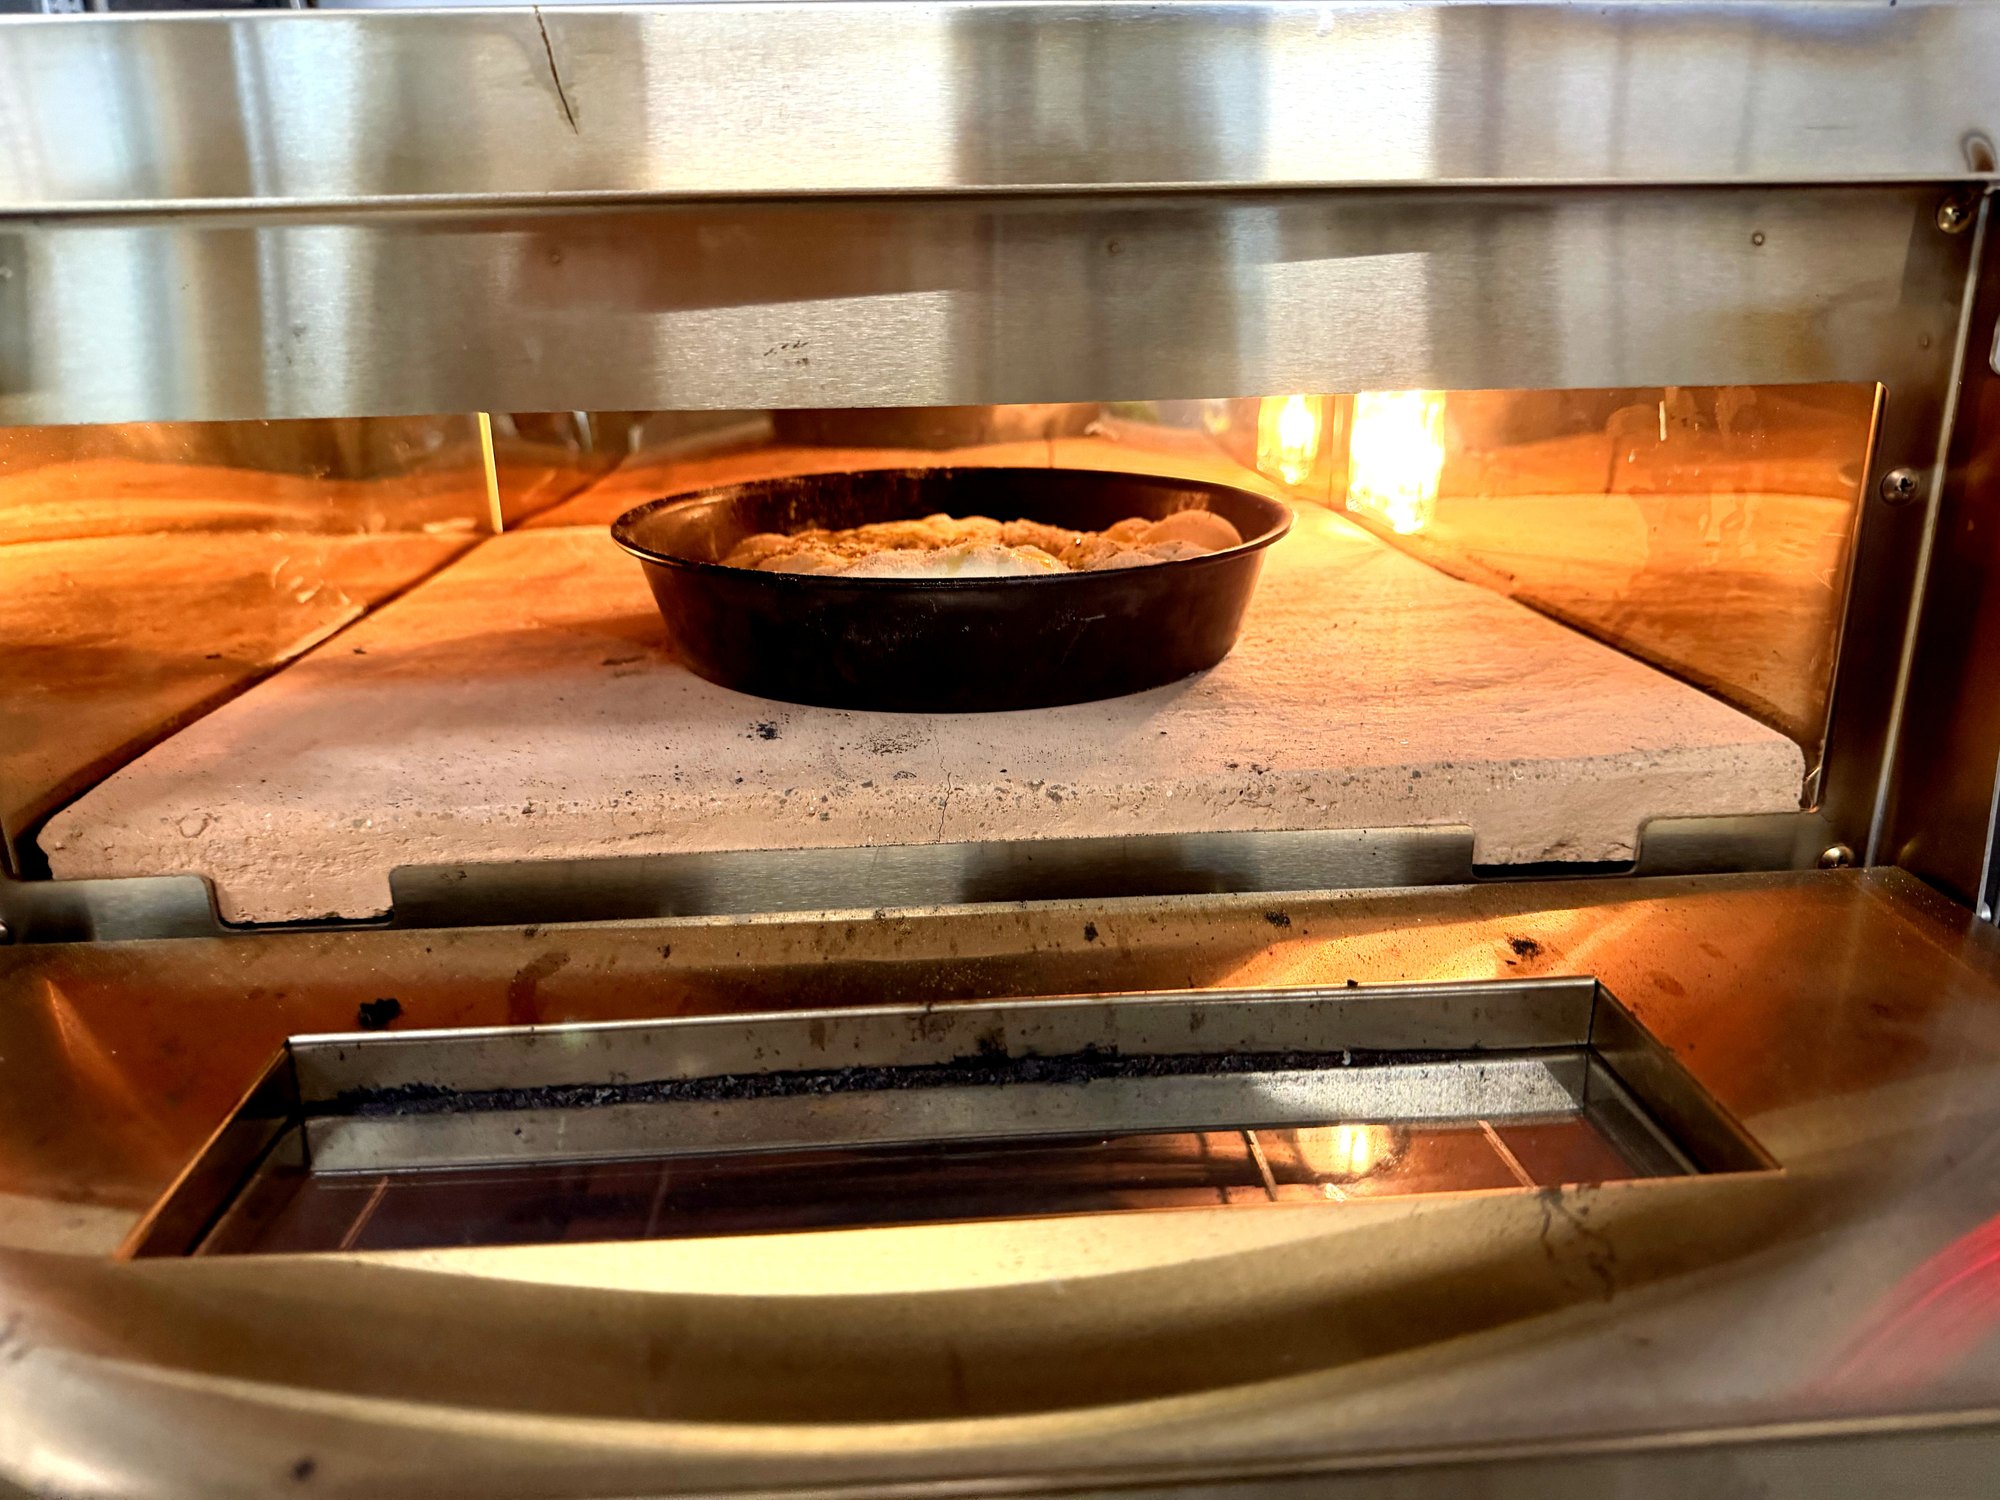
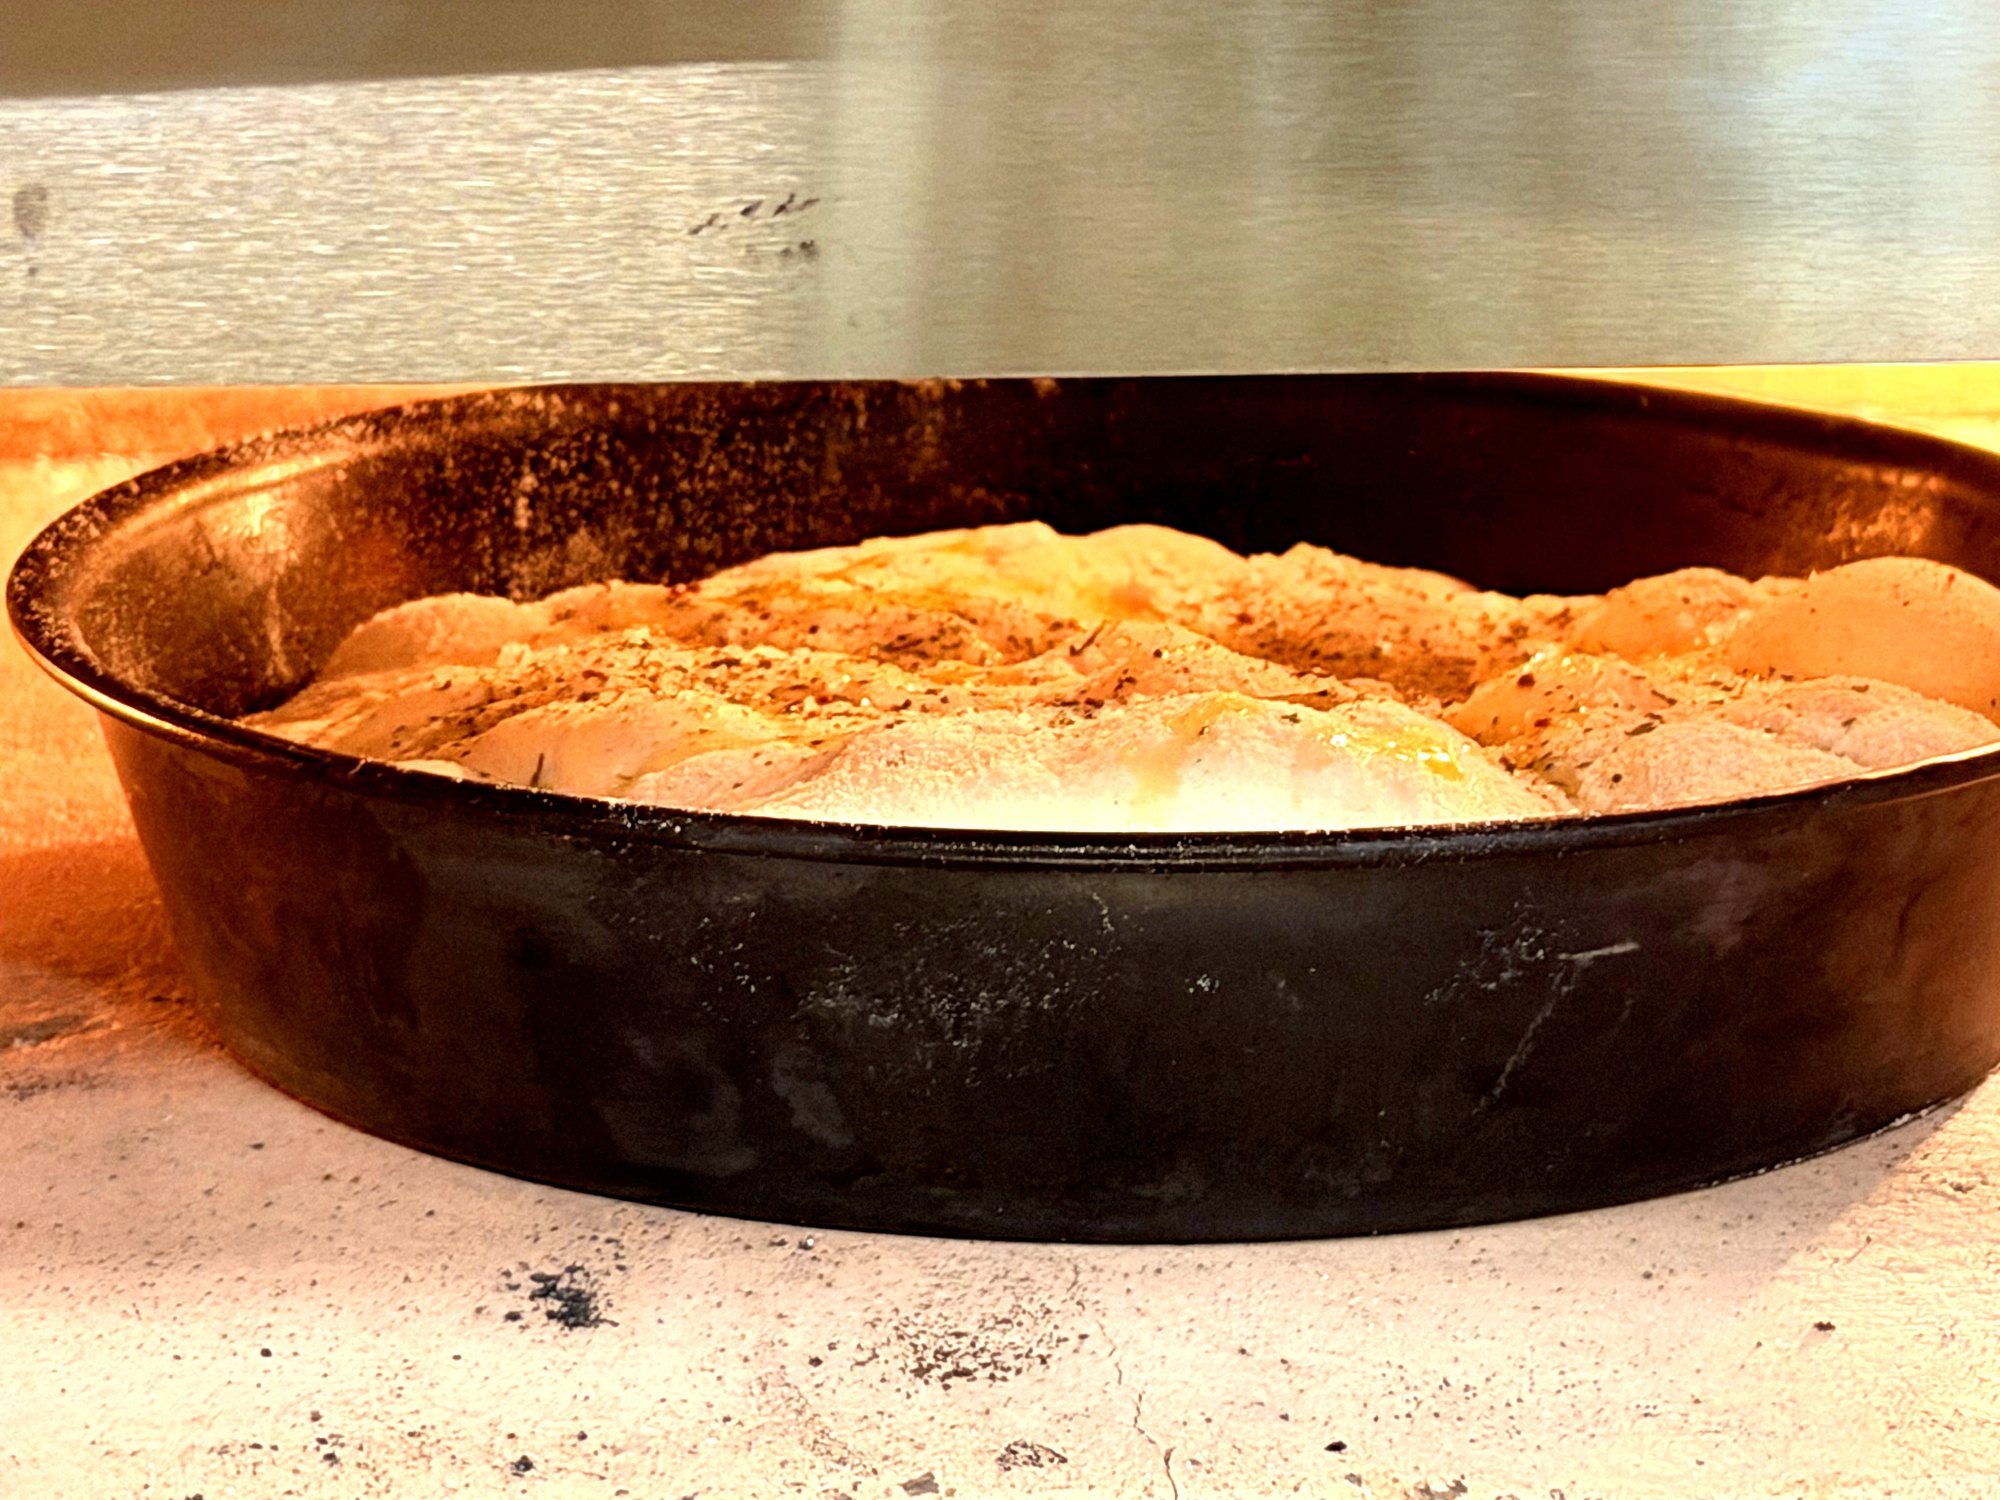
I baked it in my PizzaParty Tentazione MAX GT4, an electric pizza oven with separately adjustable top and bottom heat, at 350 °C with the door open at the front, for about 20 minutes, then inverted and continued baking.
This was an experiment at your own risk, not a recommendation. The manufacturer’s approval for the pan is 250 °C. The reason for this is usually the risk of the metal warping, especially with large, thin pans, which I’ve experienced myself. A small pan with a 4 cm high rim like this has more stability. Nevertheless, the manufacturer covers themselves with the 250 °C, and I usually stick to that limit.
Inverting itself is worthwhile, regardless of the temperature: with a 4 cm rim, the underside is in the pan the whole time and gets hardly any direct heat. Flip the bread out after the first phase and finish baking it upside down, so both sides are brown instead of just the top.
Rub thinly with vegetable oil before and after each use. Never put in the dishwasher. Over time, a dark patina will form, and that’s exactly what you want because then nothing will stick.
Highly acidic things like lemon, vinegar, or pure tomato paste attack the oxide layer. Your dough is not meant for this, even if it smells sour. It’s completely uncritical.
Frequently asked questions
How long do you bake bread from pizza dough?
At 250 °C, go by color, not by the clock. As soon as the bread is golden brown all around, it’s done. If you’re unsure, knock on the underside with your knuckle: if it sounds hollow, it’s done; if it sounds dull, it needs a few more minutes. The exact time depends on the oven, pan, and dough amount, so I’m deliberately not giving you a minute count here.
Can you still eat pizza dough that smells sour?
Slightly sour or fruity is quite normal for a long-fermented dough. However, the smell alone is not enough for assessment; also, look at the structure. With a distinct alcoholic smell, significant collapse, or if the dough has become truly liquid, I no longer use it.
What do I do if the dough has completely collapsed?
If it’s structureless, extremely sticky, and almost wet and shiny, it’s enzymatic over-proofing. The proteases have permanently broken down the gluten protein. Even in the pan, it will only result in a dense, doughy outcome without crispiness. You can skip that.
Can I freeze pizza dough instead of throwing it away?
Freezing is a better idea as long as the dough is still in shape. Once it’s over-proofed, you won’t fix that by freezing. I’ve deliberately not included a tested guide with times for freezing and thawing here; I prefer to write it when I’ve thoroughly tested it myself.
Honestly, the pan was the only sensible decision for this dough. As a pizza, I would have struggled and been annoyed in the end. As bread, it was gone in ten minutes, and that’s why there’s no photo of the finished result. Next time, I’ll have the camera ready beforehand, I promise.
Such leftover experiments usually make it into my newsletter before they appear here as an article.
Brot aus übergarem Pizzateig in der Blechform
Ingredients
- 1 Stk übrig gebliebener Pizzateigling mit Poolish angesetzt (Do. Poolish, Fr. Teig), Sa. 5h Raumtemperatur beim Workshop, dann übers Wochenende Kühlschrank, Mo. nochmal 5h Raumtemperatur, in extremer Volumen-Übergare, ca. 270–290 g
- 2 EL Olivenöl für Form und Oberfläche
- 1 Prise Flockensalz
- 1 TL Kräuter der Provence
Instructions
- Teig prüfen: große Blasen und noch vorhandene Struktur sind gut. Zerlaufener, fast nass glänzender Teig taugt nicht mehr.
- Boden einer runden Blechform (Ø 20 cm, 4 cm Rand) mit Olivenöl einreiben.
- Teig mit der Teigspachtel vorsichtig in die Form heben. Nicht kneten, nicht falten, nicht entgasen.
- Nur die größten Luftblasen oben aufzwicken, die kleinen bleiben drin.
- Nochmals Olivenöl auf die Oberfläche, dann Flockensalz und Kräuter der Provence.
- Bei 250 °C backen, bis das Brot rundum goldbraun ist. Nach Farbe gehen, nicht nach Uhr. Klausis eigener Versuch lief bei 350 °C im Pizzaofen mit offener Tür rund 20 Minuten, das liegt allerdings über der Herstellerfreigabe der Form von 250 °C.
- Brot aus der Form stürzen, umdrehen und fertig backen, damit beide Seiten braun werden.
